Abdi25

Abdi25

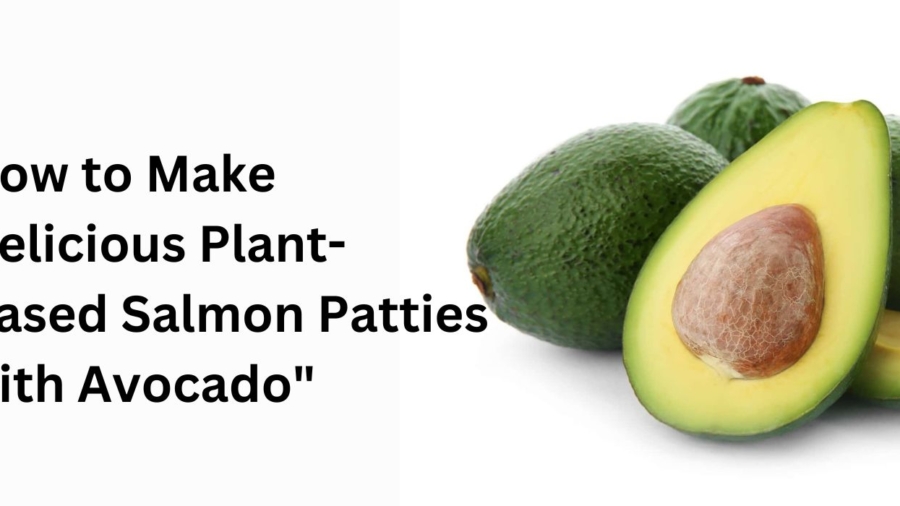
How to Make Delicious Plant-Based Salmon Patties with Avocado

If you’re looking for a flavorful, nutritious, and plant-based alternative to traditional salmon patties, you’re in the right place! These plant-based salmon patties are packed with protein, omega-3-rich ingredients, and vibrant flavors, all topped with creamy avocado. Whether you’re vegan, vegetarian, or simply exploring more plant-based meals, this recipe is sure to impress. Let’s dive into how to make these delicious patties step by step. Main Ingredients: 1 can (15 oz) of chickpeas, drained and rinsed Chickpeas serve as the primary base for these patties. They provide a hearty texture, a subtle nutty flavor, and a great source of plant-based protein and fiber. Draining and rinsing the chickpeas helps to remove excess salt and any residue from the canning liquid, ensuring a cleaner taste. 1 cup of cooked sweet potato (mashed) The sweet potato acts as a binder and adds a natural sweetness and creaminess to the patties. It also enhances the nutritional profile, contributing vitamins like A and C, as well as antioxidants and fiber. Mashed sweet potato ensures a smooth consistency that helps hold the patties together. Binding Agents: 2 tablespoons of ground flaxseed + 5 tablespoons of water (flax egg) A “flax egg” is a vegan alternative to traditional eggs and plays a vital role in binding the ingredients together. When mixed with water, ground flaxseed forms a gel-like consistency that helps keep the patties intact during cooking. Flaxseed is also rich in omega-3 fatty acids, which add a healthy boost to the recipe. Flavor Enhancers: 2 tablespoons of nutritional yeast Nutritional yeast is a must-have ingredient in vegan cooking. It provides a cheesy, umami flavor that enhances the overall taste of the patties. Additionally, it’s a great source of B vitamins and protein. 1 tablespoon of soy sauce or tamari Soy sauce or tamari (for a gluten-free option) adds a savory, salty depth of flavor to the patties. It works as a seasoning agent, balancing the sweetness of the sweet potato with a hint of umami. 1 teaspoon of smoked paprika Smoked paprika brings a warm, smoky flavor to the patties, adding complexity and a hint of spice. This spice complements the earthy tones of the chickpeas and sweet potato while creating a satisfying depth. 1 teaspoon of garlic powder Garlic powder is a versatile seasoning that delivers a mellow, savory garlic flavor evenly throughout the patties. It’s less pungent than fresh garlic and blends seamlessly with the other spices. 1 teaspoon of onion powder Onion powder adds a subtle sweetness and enhances the savory flavor profile of the patties. Like garlic powder, it’s a convenient way to evenly distribute flavor without overpowering the dish. 1 tablespoon of fresh dill, chopped (optional) Fresh dill adds a pop of brightness and a refreshing, slightly tangy flavor. While optional, it can elevate the patties by adding an herbal note that pairs well with the other ingredients. Texture and Structure: ½ cup of breadcrumbs (use gluten-free if needed) Breadcrumbs play a dual role: they act as a binding agent and give the patties structure, ensuring they hold their shape while cooking. Using gluten-free breadcrumbs makes this recipe accessible to those with gluten sensitivities. Seasoning: ½ teaspoon of salt Salt enhances all the flavors in the recipe, bringing out the natural sweetness of the sweet potato and the umami notes of the soy sauce and nutritional yeast. ¼ teaspoon of black pepper Black pepper adds a subtle hint of spice and warmth, balancing the overall flavor profile and preventing the patties from tasting too sweet or bland. These ingredients combine to create patties that are not only delicious but also packed with nutrients. The balance of chickpeas, sweet potato, and flaxseed ensures they’re hearty and satisfying, while the seasonings and herbs elevate the flavor, making them perfect for a wide variety of dishes, from burgers to grain bowls For Serving: 1 ripe avocado, sliced Lemon wedges Fresh greens or salad mix Instructions Step 1: Prepare the Flax Egg In a small bowl, mix the ground flaxseed and water. Stir well and let it sit for 5 minutes until it forms a gel-like consistency. This will act as a binder for the patties. Step 2: Mash the Chickpeas In a large mixing bowl, mash the chickpeas with a fork or potato masher. Leave some texture—you don’t want it to be completely smooth. Step 3: Combine the Ingredients Add the mashed sweet potato, flax egg, nutritional yeast, soy sauce, smoked paprika, garlic powder, onion powder, dill (if using), salt, and pepper to the bowl with the chickpeas. Mix everything together until well combined. Step 4: Add the Breadcrumbs Gradually add the breadcrumbs to the mixture, stirring until the mixture holds together. If it’s too wet, add a bit more breadcrumbs; if it’s too dry, add a splash of water. Step 5: Shape the Patties Divide the mixture into 6-8 equal portions and shape them into patties. Place the patties on a plate or tray lined with parchment paper. Step 6: Cook the Patties Heat a non-stick skillet over medium heat and lightly grease it with olive oil or cooking spray. Cook the patties for 4-5 minutes on each side until golden brown and heated through. Be gentle when flipping them to prevent breaking. Step 7: Assemble and Serve Serve the patties warm, topped with sliced avocado and a squeeze of fresh lemon juice. Pair them with a side of greens, salad, or even your favorite dipping sauce for a complete meal. Tips for Success Make Ahead: You can prepare the patties ahead of time and store them in the fridge for up to 3 days. Reheat them in a skillet or oven before serving. Customize the Flavor: Add a splash of liquid smoke or seaweed flakes for a more “seafood-like” flavor. Freezing Option: These patties freeze well! Freeze them uncooked or cooked, then reheat in the oven or skillet. Why You’ll Love This Recipe Nutrient-Rich: Packed with plant-based protein, fiber, and healthy fats. Quick and Easy: Ready in under 30 minutes.

How to Make Delicious Plant-Based Salmon Patties with Avocado Read More »

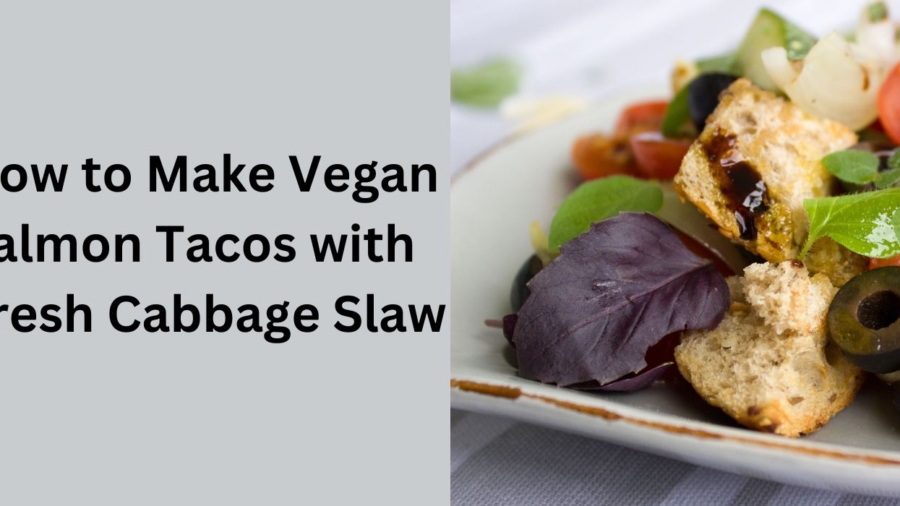
How to Make Vegan Salmon Tacos with Fresh Cabbage Slaw

Are you craving tacos but want to keep it plant-based? Vegan salmon tacos with fresh cabbage slaw are a delicious and healthy alternative that’s packed with flavor and nutrients. Perfect for taco night or a quick lunch, this recipe will satisfy your cravings without compromising your dietary preferences. 1. Firm Tofu or Tempeh (or 1 Medium-Sized Carrot) Firm Tofu: Provides a smooth, firm texture that closely mimics the flakiness of cooked salmon. Tofu is highly absorbent, making it ideal for soaking up the marinade’s flavors. Nutritional Benefits: High in plant-based protein, calcium, and iron, making it a nutritious and versatile base. Tempeh: Has a slightly firmer and grainier texture compared to tofu, giving it a “meatier” feel. Its nutty and earthy flavor complements the smoky marinade well. Nutritional Benefits: Packed with protein and fiber, as well as probiotics from the fermentation process. Carrot: When thinly sliced, carrots take on a delicate texture similar to smoked salmon. Their vibrant orange color naturally resembles salmon without the need for artificial dyes. Nutritional Benefits: Rich in beta-carotene (vitamin A), antioxidants, and dietary fiber. 2. 2 Tablespoons Soy Sauce Role: Adds a deep umami flavor, creating a savory and salty profile reminiscent of seafood. Why It’s Important: Enhances the richness of the dish while acting as a natural seasoning. Nutritional Benefits: Provides a small amount of protein and adds depth without the need for extra salt. 3. 1 Tablespoon Liquid Smoke Role: Creates the signature smoky flavor of salmon, especially smoked salmon. Why It’s Important: Mimics the curing and smoking process traditionally used for fish. Nutritional Benefits: Low in calories but powerful in flavor, allowing you to achieve complexity without additional fats or sugars. 4. 1 Tablespoon Olive Oil Role: Adds richness and moisture to the vegan salmon, ensuring it doesn’t dry out during cooking. Why It’s Important: Mimics the natural fattiness of salmon, which is key for texture and mouthfeel. Nutritional Benefits: A healthy fat source rich in monounsaturated fats and antioxidants. 5. 1 Teaspoon Smoked Paprika Role: Enhances the smoky flavor while contributing a subtle sweetness and vibrant red hue to the marinade. Why It’s Important: Helps replicate the color and smoky depth of real salmon. Nutritional Benefits: Contains antioxidants like beta-carotene, along with a touch of vitamins A and E. 6. 1 Teaspoon Garlic Powder Role: Adds a warm, savory undertone that enhances the overall flavor profile of the dish. Why It’s Important: Balances out the smokiness and sweetness, giving the marinade a well-rounded taste. Nutritional Benefits: Contains small amounts of vitamins and minerals and has antimicrobial properties. 7. 1 Teaspoon Nori Flakes (Optional) Role: Introduces a “sea” flavor, replicating the oceanic taste of real salmon. Why It’s Important: Adds authenticity to the dish, especially for seafood lovers. Nutritional Benefits: High in iodine, as well as vitamins and minerals like calcium and magnesium. 8. 1 Tablespoon Maple Syrup Role: Balances the smoky and savory flavors with a touch of sweetness, which is often present in cured salmon. Why It’s Important: Helps the marinade caramelize slightly during cooking, creating a beautiful glaze. Nutritional Benefits: A natural sweetener with small amounts of minerals like manganese and zinc. 9. Juice of 1 Lemon Role: Adds brightness and acidity, cutting through the richness and tying all the flavors together. Why It’s Important: Enhances the freshness and gives the vegan salmon a citrusy, zesty kick similar to seafood. Nutritional Benefits: High in vitamin C, promoting immune health and aiding in flavor balance. Each ingredient is carefully chosen to replicate the taste, texture, and appearance of salmon while providing nutritional benefits and staying true to plant-based eating. Together, they create a balanced, flavorful vegan alternative to salmon For the Fresh Cabbage Slaw: 2 cups shredded red or green cabbage 1 small carrot, shredded 1/4 cup chopped fresh cilantro 2 tablespoons vegan mayonnaise 1 tablespoon lime juice 1 teaspoon agave or maple syrup Salt and pepper to taste For the Tacos: 6 small corn or flour tortillas Sliced avocado (optional) Lime wedges for serving Instructions Step 1: Prepare the Vegan Salmon If using tofu or tempeh, press it for about 10-15 minutes to remove excess moisture. If using carrot, peel it and slice it into thin strips resembling salmon fillets. In a small bowl, mix soy sauce, liquid smoke, olive oil, smoked paprika, garlic powder, nori flakes (if using), maple syrup, and lemon juice. Marinate the tofu, tempeh, or carrot in the mixture for at least 20 minutes, allowing the flavors to soak in. Heat a non-stick skillet over medium heat. Cook the marinated pieces for 3-4 minutes on each side until golden and slightly crispy. Set aside. Step 2: Make the Cabbage Slaw In a large mixing bowl, combine shredded cabbage, shredded carrot, and cilantro. In a small bowl, whisk together vegan mayonnaise, lime juice, agave or maple syrup, salt, and pepper. Pour the dressing over the cabbage mixture and toss until well combined. Set aside. Step 3: Assemble the Tacos Warm the tortillas in a skillet or microwave until pliable. Add a layer of cabbage slaw to each tortilla. Top with slices of the vegan salmon, then add sliced avocado if desired. Serve with lime wedges for an extra burst of freshness. Tips for Success Get Creative with the “Salmon”: You can also use jackfruit, chickpeas, or other plant-based proteins to switch things up. Adjust the Heat: Add sliced jalapeño or a drizzle of hot sauce for some spice. Meal Prep Friendly: Make the vegan salmon and cabbage slaw ahead of time for an easy meal. These vegan salmon tacos with fresh cabbage slaw are the perfect balance of smoky, tangy, and crunchy. Whether you’re vegan or just exploring new flavors, this recipe is sure to impress. Give it a try and let us know how it turns out!

How to Make Vegan Salmon Tacos with Fresh Cabbage Slaw Read More »

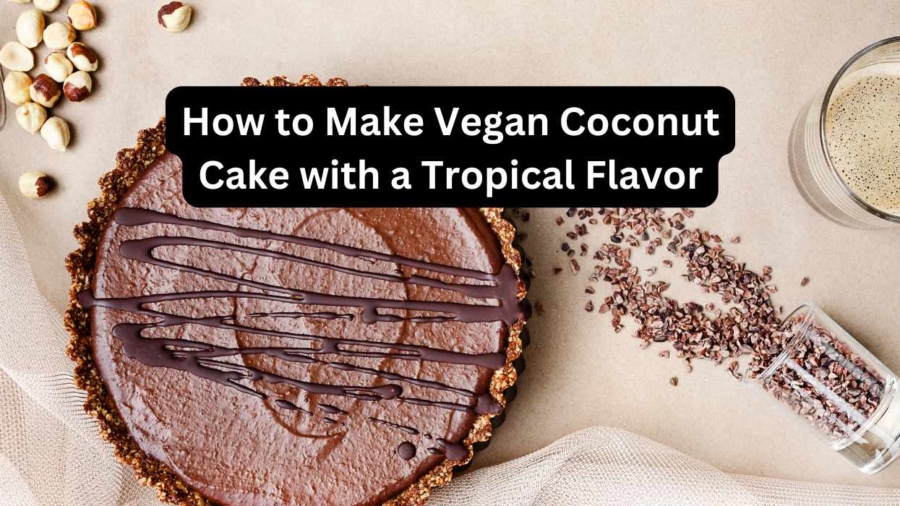
How to Make Vegan Coconut Cake with a Tropical Flavor

How to Make Vegan Coconut Cake with a Tropical Flavor

If you love tropical flavors, this Vegan Coconut Cake with a Tropical Flavor is a delightful dessert that will transport your taste buds to a sunny beachside paradise. With its moist texture, subtle coconut flavor, and a burst of tropical fruit, this cake is the perfect treat for any occasion. Whether you’re celebrating a special event or just craving something sweet, this vegan coconut cake will not disappoint. Best of all, it’s completely dairy-free and egg-free, making it suitable for a variety of dietary needs. Let’s dive into how to make this tropical-inspired cake that is as beautiful as it is delicious. Why Choose Vegan Coconut Cake? Coconut cake is a timeless favorite for its light and fluffy texture, and when made vegan, it’s just as rich and satisfying. In this recipe, we replace dairy and eggs with plant-based alternatives that maintain the same moist texture and flavor. Vegan baking doesn’t mean sacrificing taste — it means finding new, creative ways to make your favorite treats while keeping them kind to the planet and your health. This Vegan Coconut Cake delivers all the tropical goodness of coconut, with a hint of fruity sweetness, without any animal-derived ingredients. Perfect for vegans and anyone looking for a lighter, plant-based version of their favorite cake. Ingredients for Vegan Coconut Cake with Tropical Flavor To bring this Vegan Coconut Cake to life, you’ll need the following simple ingredients: For the Cake: 2 cups all-purpose flour – The foundation of the cake, creating a light and fluffy texture. If you need a gluten-free option, you can substitute with a gluten-free flour blend. 1 cup granulated sugar – This adds sweetness and helps to balance the coconut’s natural richness. 1 1/2 teaspoons baking powder – Leavening agent to help the cake rise. 1/4 teaspoon salt – Enhances the sweetness and flavor of the cake. 1 cup canned coconut milk – Rich, creamy, and full of coconut flavor, it helps keep the cake moist. 1/4 cup vegetable oil or coconut oil – Adds moisture and richness to the cake. 1 teaspoon vanilla extract – A classic flavor that complements the coconut. 1/2 cup unsweetened applesauce – A natural sweetener and moisture agent, replacing eggs in this recipe. 1 cup shredded coconut – This is what gives the cake its unmistakable coconut flavor and texture. 1/2 cup crushed pineapple – Adds a tropical fruit flavor that pairs perfectly with coconut. For the Frosting: 1/2 cup vegan butter – A creamy base for the frosting. 3 cups powdered sugar – Sweetens the frosting and gives it a smooth consistency. 1 teaspoon vanilla extract – Adds depth of flavor to the frosting. 2 tablespoons canned coconut milk – Helps to achieve the perfect creamy consistency for the frosting. 1/2 cup shredded coconut (optional for topping) – Adds a lovely texture and extra coconut flavor on top of the frosting. Tropical fruits for decoration (optional) – Mango, passion fruit, or papaya can be used to add color and a touch of exotic flavor. Step-by-Step Instructions for Making Vegan Coconut Cake with Tropical Flavor Step 1: Preheat the Oven and Prepare the Cake Pan The first step in creating your vegan coconut cake is to prepare your kitchen and baking tools. Preheating the oven to 350°F (175°C) ensures that the temperature is just right when your cake batter is ready to bake. This temperature allows the cake to rise evenly and bake through without being too dense or raw in the middle. Next, prepare your cake pans. Greasing the pans with oil and dusting them with flour helps the cake layers come out easily once baked. Alternatively, you can line the pans with parchment paper. This is a great option to guarantee that the cakes don’t stick, especially when baking delicate vegan cakes that might need a little extra help during removal. The preparation of your cake pans is crucial for a smooth and easy cake release after baking. Step 2: Mix the Dry Ingredients In this step, you’ll combine the dry ingredients to create a uniform base for your cake batter. Begin by placing flour, sugar, baking powder, and salt into a large mixing bowl. Use a whisk to thoroughly mix these ingredients together. This ensures that the baking powder is evenly distributed throughout the flour, which is important for making the cake light and airy. If the baking powder is clumped in one spot, your cake may rise unevenly. The sugar in this mix will help sweeten the cake while providing moisture and a slight crunch to the outer layer during baking. The salt balances the sweetness and enhances the other flavors in the cake, so don’t skip it. This step is essential for creating the proper texture and foundation for the cake, as the even distribution of ingredients will affect the cake’s structure. Step 3: Add the Wet Ingredients Now it’s time to add the wet ingredients to your dry ingredients, creating the batter for the cake. Add coconut milk, vegetable oil, vanilla extract, and applesauce to the dry mixture. Stir the ingredients together until the batter is smooth. The coconut milk adds richness and flavor, while the oil ensures that the cake is moist. The vanilla extract enhances the overall flavor profile, adding a sweet, warm note that complements the tropical flavors. The applesauce is used as a vegan egg replacement, providing moisture and helping to bind the ingredients together. When mixing, the batter should be thick yet pourable. If it seems too thick, add a little more coconut milk to achieve the right consistency. The goal is to make a smooth, consistent batter that will bake evenly. Step 4: Fold in the Coconut and Pineapple Now, for the tropical twist: shredded coconut and crushed pineapple. Gently fold these ingredients into the batter to ensure that they are evenly distributed without overmixing. Folding involves gently stirring the ingredients in with a spatula or spoon, which prevents the air from being deflated in the batter. The shredded coconut

How to Make Vegan Coconut Cake with a Tropical Flavor Read More »

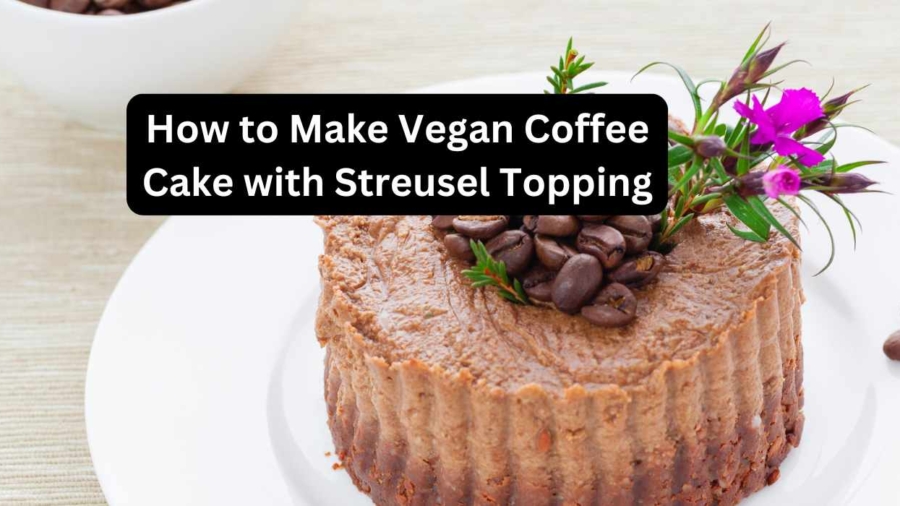
How to Make Vegan Coffee Cake with Streusel Topping

How to Make Vegan Coffee Cake with Streusel Topping

Coffee cake is the perfect treat for brunch, afternoon tea, or any time you’re in the mood for something comforting and sweet. This Vegan Coffee Cake with Streusel Topping is a decadent, plant-based version of the traditional coffee cake, made without dairy or eggs but still incredibly moist and flavorful. The warm cinnamon and sugar streusel topping adds a crunchy, buttery finish that complements the soft, fluffy cake perfectly. This cake pairs wonderfully with your favorite cup of coffee or tea, making it a delightful choice for breakfast or dessert. Why Choose Vegan Coffee Cake? This Vegan Coffee Cake is a great option for anyone who follows a plant-based diet, but it’s so delicious that even non-vegans will love it! The cake is made without animal products like eggs or dairy, yet it still has that rich, buttery texture thanks to the use of plant-based ingredients like non-dairy milk and vegan butter. The streusel topping, made with a mixture of brown sugar, cinnamon, and vegan butter, adds a delicious crunch and sweetness that takes the cake to the next level. Not only is this cake dairy-free and egg-free, but it’s also incredibly easy to make. With a few simple ingredients, you can create a moist, flavorful cake that’s sure to impress your family and friends. Ingredients for Vegan Coffee Cake with Streusel Topping To make this Vegan Coffee Cake, you’ll need the following ingredients: For the Cake: 2 cups all-purpose flour – The base of the cake. You can substitute with a gluten-free flour blend if necessary. 1 cup granulated sugar – Adds sweetness to balance the spices and flavors. 1 tablespoon baking powder – Helps the cake rise and become light and fluffy. 1/2 teaspoon baking soda – Works in combination with the vinegar to help the cake rise. 1/2 teaspoon salt – Enhances the sweetness of the cake. 1/2 cup non-dairy milk – Use almond milk, soy milk, or oat milk. 1/4 cup vegetable oil – Keeps the cake moist and tender. 1 teaspoon vanilla extract – Adds depth to the flavor. 1 tablespoon apple cider vinegar – Reacts with the baking soda to help the cake rise and make it fluffy. 1/2 cup unsweetened applesauce – Adds moisture and helps to bind the ingredients without eggs. For the Streusel Topping: 1/2 cup brown sugar – Adds sweetness and a slight caramel flavor. 1/2 cup all-purpose flour – Helps form the crumbly texture of the streusel topping. 1/4 cup vegan butter – Provides a buttery texture for the streusel. 1 tablespoon ground cinnamon – Adds warmth and flavor. 1/4 teaspoon salt – Balances the sweetness of the topping. Step-by-Step Instructions for Vegan Coffee Cake with Streusel Topping Step 1: Prepare the Streusel Topping In a small bowl, combine the brown sugar, flour, cinnamon, and salt for the streusel topping. Add the vegan butter and mix with a fork or your fingers until the mixture becomes crumbly and well combined. Set aside. Step 2: Preheat the Oven and Prepare the Pan Preheat your oven to 350°F (175°C). Grease and flour an 8-inch round cake pan, or line it with parchment paper to prevent sticking. Step 3: Mix the Dry Ingredients In a large mixing bowl, whisk together the flour, baking powder, baking soda, and salt. Set aside. Step 4: Mix the Wet Ingredients In another bowl, whisk together the non-dairy milk, sugar, apple cider vinegar, vegetable oil, applesauce, and vanilla extract until smooth. Step 5: Combine the Wet and Dry Ingredients Gradually add the wet ingredients to the dry ingredients, mixing gently until just combined. Be careful not to overmix the batter. The batter should be thick and smooth. Step 6: Pour the Batter into the Pan Pour the batter into the prepared cake pan, spreading it evenly with a spatula. Tap the pan gently on the counter to remove any air bubbles. Step 7: Add the Streusel Topping Evenly sprinkle the streusel topping over the batter. Use a fork or your hands to gently press the topping into the batter, ensuring it’s slightly embedded. Step 8: Bake the Cake Bake the cake for 30-35 minutes, or until a toothpick inserted into the center comes out clean. The cake should be golden brown on top and firm to the touch. Step 9: Cool and Serve Once baked, remove the cake from the oven and let it cool in the pan for about 10 minutes. Transfer the cake to a wire rack to cool completely before slicing. Why You’ll Love This Vegan Coffee Cake with Streusel Topping This Vegan Coffee Cake is the perfect balance of sweet and spiced, with a soft and fluffy texture and a crunchy, cinnamon-sugar topping. The streusel topping is what really sets this cake apart, adding a layer of sweetness and texture that perfectly complements the light, moist cake. Whether you’re serving it for breakfast, brunch, or as a dessert, this cake is sure to become a favorite in your home. Pro Tips for the Best Vegan Coffee Cake Use Room Temperature Ingredients: For the best texture, make sure your non-dairy milk, vegan butter, and applesauce are at room temperature before mixing. Add Extra Spices: If you love a spicier flavor, feel free to add a pinch of nutmeg or allspice to the batter for an extra kick. Store Properly: This cake stays fresh for up to 3 days when stored in an airtight container at room temperature. You can also freeze it for up to a month. Customize the Topping: Add chopped nuts like walnuts or pecans to the streusel topping for added crunch. Conclusion This Vegan Coffee Cake with Streusel Topping is the perfect treat for anyone who loves a sweet, comforting cake with a bit of crunch. It’s easy to make, incredibly flavorful, and can be enjoyed by vegans and non-vegans alike. Whether you’re serving it for a special occasion or just enjoying it with a cup of coffee, this cake is sure to delight everyone who tries i

How to Make Vegan Coffee Cake with Streusel Topping Read More »

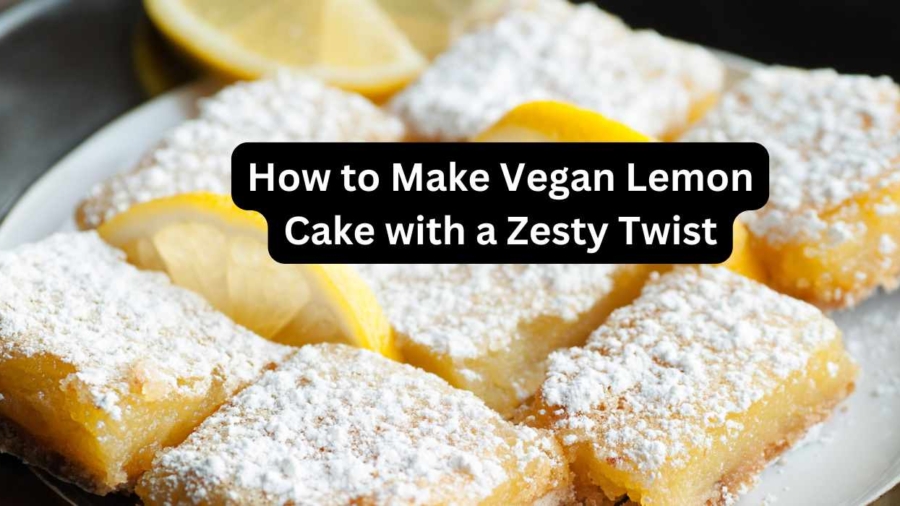
How to Make Vegan Lemon Cake with a Zesty Twist

How to Make Vegan Lemon Cake with a Zesty Twist

Lemon cake is the ultimate citrus dessert, loved for its refreshing, tangy flavor and moist texture. This Vegan Lemon Cake with a Zesty Twist takes that traditional cake and elevates it with vibrant lemon flavors and a light, fluffy crumb—without any eggs or dairy. It’s the perfect dessert for any occasion, whether you’re celebrating a special event or simply indulging in a bright, citrusy treat. This cake is bursting with fresh lemon zest and juice, making it a zesty delight for anyone who enjoys the tartness and fragrance of lemons. Why Choose Vegan Lemon Cake? This Vegan Lemon Cake is a great option for those who follow a plant-based lifestyle, but it’s so delicious that anyone will enjoy it. The cake is made without dairy, eggs, or any animal products, so it’s a perfect treat for vegans or anyone with food allergies. Thanks to the use of plant-based ingredients like flax eggs and non-dairy milk, the texture is just as light and fluffy as any traditional cake, while still remaining dairy-free and egg-free. The lemon flavor is key to this cake, with fresh lemon zest adding an extra punch, and the lemon juice helping to keep the cake moist. The cake can be served with a simple glaze, or you can take it up a notch by frosting it with a lemon buttercream frosting to really make it shine. Ingredients for Vegan Lemon Cake with a Zesty Twist To make this Vegan Lemon Cake, you’ll need the following ingredients: For the Cake: 1 1/2 cups all-purpose flour – The base for the cake. You can substitute it with a gluten-free flour blend if desired. 1 cup granulated sugar – Adds sweetness to balance out the tartness of the lemon. 1 tablespoon baking powder – Helps the cake rise and become light and fluffy. 1/2 teaspoon baking soda – Reacts with the acidity of the lemon juice to help the cake rise. 1/4 teaspoon salt – Enhances the sweetness of the cake and balances the flavors. 1/2 cup vegetable oil – Keeps the cake moist and tender. 1 cup non-dairy milk – Almond milk, soy milk, or oat milk work well in this recipe. 2 tablespoons lemon zest – Fresh lemon zest provides a burst of citrusy fragrance and flavor. 1/4 cup fresh lemon juice – Adds tanginess and moisture to the cake. 2 tablespoons ground flaxseed – Mixed with water to form flax eggs, which replace the eggs in this recipe. 1 teaspoon vanilla extract – Adds warmth and depth to the flavor. For the Lemon Glaze (Optional): 1 cup powdered sugar – Provides the sweetness needed for the glaze. 2 tablespoons fresh lemon juice – For an extra zing of lemon flavor. 1/2 teaspoon lemon zest – Optional, for extra lemony goodness in the glaze. Step-by-Step Instructions for Vegan Lemon Cake with a Zesty Twist Step 1: Prepare the Flax Eggs In a small bowl, combine the ground flaxseed with 6 tablespoons of water. Stir and let it sit for about 5–10 minutes to thicken and form a gel-like consistency. This flax mixture will act as the egg replacement in the cake. Step 2: Preheat the Oven and Prepare the Pans Preheat your oven to 350°F (175°C). Grease and flour two 8-inch round cake pans, or line them with parchment paper to prevent sticking. Step 3: Mix the Dry Ingredients In a large mixing bowl, whisk together the flour, baking powder, baking soda, and salt. Set aside. Step 4: Mix the Wet Ingredients In another bowl, combine the sugar, non-dairy milk, vegetable oil, flax eggs, lemon zest, lemon juice, and vanilla extract. Whisk everything together until smooth and well combined. Step 5: Combine Wet and Dry Ingredients Slowly add the wet ingredients to the dry ingredients. Mix until just combined, but be careful not to overmix the batter. The batter should be smooth and slightly thick. Step 6: Bake the Cake Divide the batter evenly between the prepared cake pans. Use a spatula to smooth the tops. Bake for 25-30 minutes, or until a toothpick inserted into the center comes out clean. Once done, remove the cakes from the oven and let them cool in the pans for about 10 minutes before transferring them to wire racks to cool completely. Step 7: Make the Lemon Glaze (Optional) While the cake is cooling, make the glaze. In a small bowl, whisk together the powdered sugar, lemon juice, and lemon zest until smooth and well combined. If the glaze is too thick, add a little more lemon juice until you reach the desired consistency. Step 8: Frost the Cake (Optional) Once the cakes have completely cooled, drizzle the lemon glaze over the top, or spread a layer of vegan lemon buttercream frosting if you want a richer, creamier finish. Why You’ll Love This Vegan Lemon Cake This Vegan Lemon Cake with a Zesty Twist is the perfect balance of sweetness and tartness. The cake is light and fluffy, while the lemon glaze adds a refreshing citrusy kick that complements the cake beautifully. With the lemon zest and lemon juice, this cake has a fresh, tangy flavor that will brighten up your day. Plus, the cake is easy to make with simple, plant-based ingredients that everyone can enjoy! Pro Tips for the Best Vegan Lemon Cake Use Fresh Lemons: For the best flavor, use fresh lemons instead of bottled lemon juice. Don’t Overmix the Batter: Overmixing the batter can lead to a dense cake. Mix just until the wet and dry ingredients are incorporated. Add More Zest: If you love a strong lemon flavor, feel free to add extra zest to both the cake and the glaze. Store the Cake Properly: To keep the cake fresh, store it in an airtight container at room temperature for up to 3 days, or refrigerate it for longer shelf life. Conclusion This Vegan Lemon Cake with a Zesty Twist is the perfect dessert for any occasion. Whether you’re hosting a party, celebrating a birthday,

How to Make Vegan Lemon Cake with a Zesty Twist Read More »

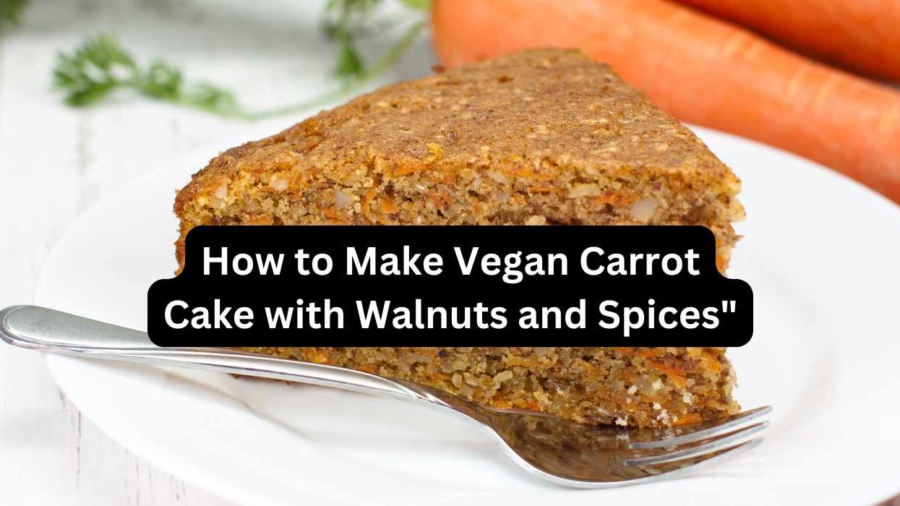
How to Make Vegan Carrot Cake with Walnuts and Spices

How to Make Vegan Carrot Cake with Walnuts and Spices

Carrot cake is a classic dessert that’s loved by many for its rich flavors and moist texture. This Vegan Carrot Cake with Walnuts and Spices offers all the warm, spiced goodness of the traditional recipe, without any animal products. Packed with grated carrots, toasty walnuts, and a blend of spices, this cake is the perfect balance of sweet and savory flavors, with a tender crumb that’s guaranteed to satisfy any cake lover. Whether you’re celebrating a special occasion or simply craving a homemade treat, this vegan version is sure to hit the spot. Why Make Vegan Carrot Cake? Carrot cake has been a favorite for generations, and for good reason: it’s rich, flavorful, and incredibly versatile. The vegan version is just as decadent as the traditional one, and it’s made with simple, plant-based ingredients that come together to create a moist, fluffy cake. There’s no need for eggs or dairy—flax eggs and plant-based milk serve as perfect substitutes, ensuring that the texture is light and airy. Plus, the combination of carrots, cinnamon, nutmeg, and ginger adds a comforting warmth that makes this cake perfect for any season. Vegan carrot cake can be made in just a few easy steps, and it can be enjoyed by everyone, whether they follow a plant-based diet or not. It’s an excellent choice for those looking to indulge without compromising their values or dietary preferences. Ingredients for Vegan Carrot Cake with Walnuts and Spices To make this delicious Vegan Carrot Cake with Walnuts and Spices, you’ll need the following ingredients: For the Cake: 2 cups all-purpose flour – This forms the base of the cake and provides structure. 1 teaspoon baking powder – Helps the cake rise and become fluffy. 1/2 teaspoon baking soda – Works with the acid in the vinegar to provide extra lift. 1 1/2 teaspoons ground cinnamon – A key spice that gives the cake its warm, comforting flavor. 1/2 teaspoon ground nutmeg – Adds a rich, aromatic flavor that pairs beautifully with the carrots. 1/4 teaspoon ground ginger – A bit of spice that complements the sweetness of the carrots. 1/4 teaspoon salt – Balances the sweetness of the cake. 1/2 cup brown sugar – Adds sweetness and moisture to the cake. You can use coconut sugar for a more natural alternative. 1/2 cup granulated sugar – Adds sweetness and helps create a light texture. 1 cup vegetable oil – Keeps the cake moist and tender. 1 cup grated carrots – The star ingredient that gives the cake its signature texture and sweetness. 1/2 cup walnuts – Chopped walnuts add crunch and a nutty flavor that pairs wonderfully with the spices. 2 flax eggs – A vegan substitute for eggs. To make flax eggs, mix 2 tablespoons of ground flaxseed with 6 tablespoons of water and let it sit for 5-10 minutes to thicken. 1 teaspoon vanilla extract – Adds a subtle sweetness and depth of flavor. 1/4 cup non-dairy milk – Almond milk, oat milk, or soy milk work well to keep the batter smooth. 1 tablespoon apple cider vinegar – Reacts with the baking soda to help the cake rise and become fluffy. For the Frosting (Optional): 1/2 cup vegan butter – Creates a creamy and smooth frosting texture. 2 cups powdered sugar – Provides sweetness and smooth consistency. 1 teaspoon vanilla extract – Adds flavor to the frosting. 2 tablespoons non-dairy milk – Helps achieve the desired frosting consistency. Step-by-Step Instructions for Vegan Carrot Cake with Walnuts and Spices Step 1: Preheat the Oven and Prepare the Pans Preheat your oven to 350°F (175°C). Grease and flour two 8-inch round cake pans or line them with parchment paper to ensure the cake doesn’t stick. Step 2: Mix the Dry Ingredients In a large mixing bowl, whisk together the flour, baking powder, baking soda, cinnamon, nutmeg, ginger, and salt. This will ensure the spices and leavening agents are evenly distributed in the batter. Step 3: Mix the Wet Ingredients In a separate bowl, combine the brown sugar, granulated sugar, vegetable oil, flax eggs, non-dairy milk, and vanilla extract. Whisk until smooth and well combined. Step 4: Combine the Wet and Dry Ingredients Slowly pour the wet ingredients into the dry ingredients, stirring gently to combine. Do not overmix the batter; just mix until the ingredients are well incorporated. Step 5: Add the Carrots and Walnuts Fold in the grated carrots and chopped walnuts. The carrots add moisture and sweetness, while the walnuts give the cake a lovely crunch and nutty flavor. Step 6: Bake the Cake Divide the batter evenly between the prepared cake pans. Bake for 30-35 minutes or until a toothpick inserted into the center of the cake comes out clean. Let the cakes cool in the pans for 10 minutes before transferring them to wire racks to cool completely. Step 7: Make the Frosting (Optional) While the cakes are cooling, prepare the frosting. In a mixing bowl, beat the vegan butter until smooth and creamy. Gradually add the powdered sugar, 1 tablespoon at a time, and continue beating until light and fluffy. Add the vanilla extract and non-dairy milk and mix until the frosting is smooth and spreadable. Step 8: Frost the Cake Once the cakes are completely cooled, spread a layer of frosting on top of the first cake layer. Place the second cake layer on top and frost the entire cake with the remaining frosting. You can decorate the cake with additional chopped walnuts or shredded coconut for extra flair. Why You’ll Love This Vegan Carrot Cake This Vegan Carrot Cake is moist, flavorful, and a great way to enjoy a healthier version of the traditional cake. It’s packed with spices and walnuts, which complement the natural sweetness of the carrots, while the vegan frosting adds a rich, creamy touch to each bite. Whether you’re making it for a special occasion or simply as a sweet treat, this cake is a guaranteed crowd-pleaser. Pro Tips for the Best Vegan Carrot Cake Don’t

How to Make Vegan Carrot Cake with Walnuts and Spices Read More »

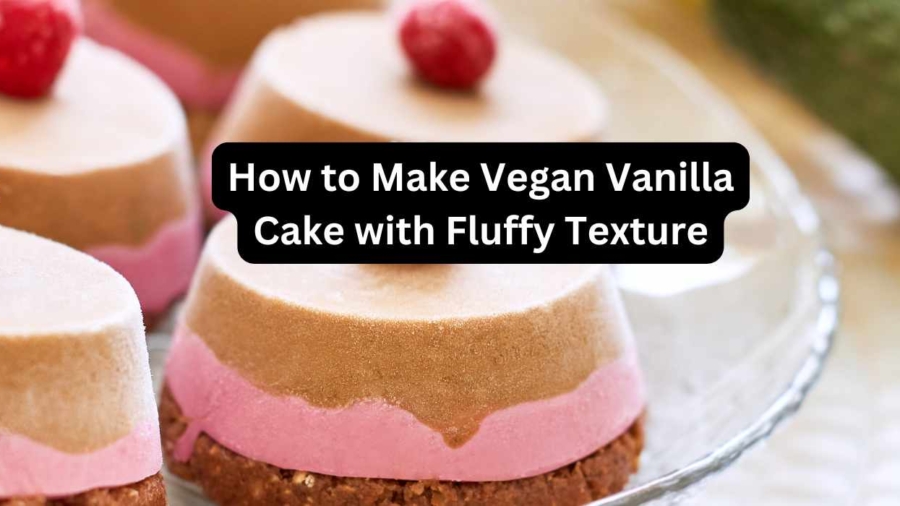
How to Make Vegan Vanilla Cake with Fluffy Texture

How to Make Vegan Vanilla Cake with Fluffy Texture

If you’re looking for a classic yet delightful treat that’s soft, fluffy, and completely vegan, this Vegan Vanilla Cake recipe is the one to try! Perfect for birthdays, weddings, or any occasion that calls for something sweet, this cake is light, tender, and has a subtle vanilla flavor that will impress even non-vegans. The best part? It’s made without any dairy, eggs, or other animal products, making it a great choice for anyone following a plant-based diet or those with allergies to common ingredients like eggs or milk. Why Choose a Vegan Vanilla Cake? Vegan cakes are not only healthier but also just as delicious as traditional cakes. Vegan Vanilla Cake is made without eggs or dairy, so it’s a guilt-free option that’s great for a wide variety of dietary needs. This cake is easy to make, requiring just a few basic ingredients, and it has a soft and airy texture that’s perfect for layering or serving on its own. One of the key differences between a regular vanilla cake and a vegan vanilla cake is the use of plant-based substitutes such as flax eggs, non-dairy milk, and vegan butter. These substitutes do a fantastic job at mimicking the texture and taste of traditional ingredients while keeping the cake completely plant-based. This cake can be made in under an hour and paired with your favorite frosting or fruit toppings. Whether you’re preparing it for a special occasion or simply to satisfy a craving for a homemade dessert, this vegan vanilla cake is sure to hit the spot. Ingredients for Vegan Vanilla Cake To make this light and fluffy Vegan Vanilla Cake, you’ll need the following ingredients: For the Cake: All-purpose flour – The main ingredient for the base of the cake, which provides structure and texture. Baking powder – The leavening agent that makes the cake rise, creating a light and fluffy texture. Baking soda – Works in combination with the vinegar to help the cake rise and create air bubbles. Sugar – Adds sweetness to the cake. You can use white, coconut, or cane sugar based on your preference. Salt – Balances the sweetness and enhances the other flavors. Flaxseed meal – Used to make a flax egg, which is a perfect vegan egg substitute that helps bind the ingredients together. Non-dairy milk – Almond milk, oat milk, or soy milk works best. It keeps the cake moist and provides creaminess without dairy. Vegetable oil – Keeps the cake moist and tender. Vanilla extract – The star flavor of the cake. Use pure vanilla extract for the best taste. Apple cider vinegar – Works with the baking soda to create a reaction that helps the cake rise and become fluffy. For the Frosting (Optional): Vegan butter – For a rich, creamy texture in the frosting. Powdered sugar – Provides sweetness and smooth consistency for the frosting. Non-dairy milk – Helps thin the frosting to your desired consistency. Vanilla extract – Adds a bit of extra flavor to the frosting. Step-by-Step Instructions for Vegan Vanilla Cake Step 1: Preheat the Oven and Prepare the Pans Preheat your oven to 350°F (175°C). Grease and flour two round cake pans (8 or 9 inches in diameter), or you can line them with parchment paper to prevent sticking. This step ensures that the cakes will come out easily once baked. Step 2: Mix the Dry Ingredients In a medium-sized bowl, whisk together the flour, baking powder, baking soda, salt, and sugar. Sifting the dry ingredients helps to avoid any lumps and ensures an even distribution of all the ingredients. Step 3: Prepare the Wet Ingredients In a separate bowl, combine the non-dairy milk, vegetable oil, flaxseed meal (mixed with water to create a flax egg), apple cider vinegar, and vanilla extract. Whisk together until smooth and well combined. Step 4: Combine the Wet and Dry Ingredients Make a well in the center of the dry ingredients and pour the wet ingredients into the bowl. Stir gently with a spoon or spatula until everything is just combined. Be careful not to overmix, as this can result in a dense cake. The batter should be smooth and thick, with a slight pourable consistency. Step 5: Bake the Cake Divide the batter evenly between the two prepared cake pans. Use a spatula to smooth out the top of the batter. Bake for 25-30 minutes or until a toothpick inserted into the center of the cakes comes out clean or with a few moist crumbs attached. Once baked, allow the cakes to cool in the pans for 10 minutes before transferring them to wire racks to cool completely. Step 6: Make the Frosting (Optional) If you’re making frosting, beat the vegan butter until smooth and creamy. Gradually add the powdered sugar, a little at a time, and continue to beat until light and fluffy. Add non-dairy milk to achieve the desired frosting consistency. Finally, beat in the vanilla extract for flavor. Step 7: Frost the Cake Once the cakes are completely cooled, spread a layer of frosting on the top of the first cake layer. Place the second cake layer on top and frost the entire cake with the remaining frosting. You can decorate the cake with sprinkles, edible flowers, or fruit for extra flair. Why You’ll Love This Vegan Vanilla Cake This Vegan Vanilla Cake is not only plant-based but also incredibly easy to make. It has a fluffy texture, a tender crumb, and a subtle vanilla flavor that’s perfect for pairing with a variety of toppings and frostings. You can also add mix-ins like fruit, chocolate chips, or nuts to customize the cake to your liking. Whether you’re vegan or simply looking to try a new way of baking, this recipe offers a simple and delicious solution. It’s the perfect cake for birthdays, holidays, or just an afternoon treat, and it’s guaranteed to be a hit at your next gathering. Pro Tips for the Best Vegan Vanilla Cake Don’t overmix the batter: Mixing the

How to Make Vegan Vanilla Cake with Fluffy Texture Read More »

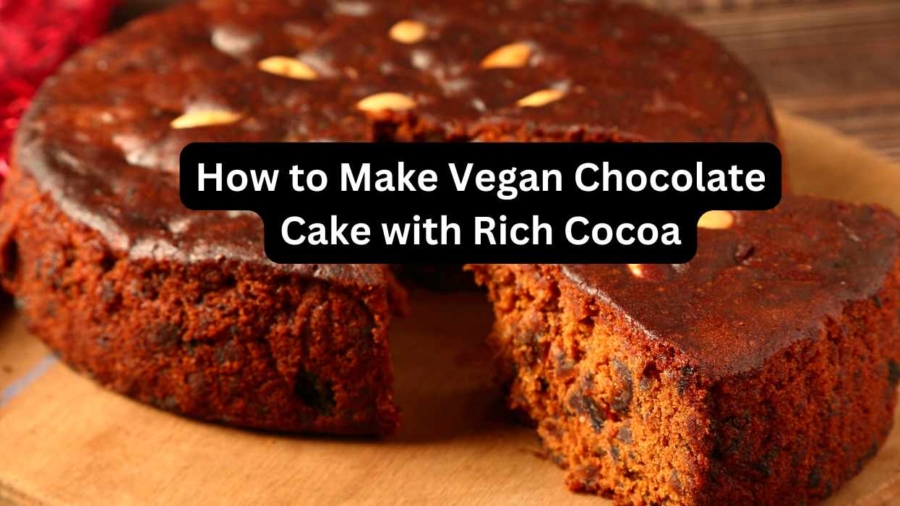
How to Make Vegan Chocolate Cake with Rich Cocoa

If you’ve been craving a decadent, moist, and rich chocolate cake without the dairy, look no further! This Vegan Chocolate Cake is perfect for satisfying your sweet tooth while being completely plant-based. Whether you’re making it for a special occasion or just because, this cake will impress with its indulgent flavor and texture. Why Choose a Vegan Chocolate Cake? Vegan cakes are becoming increasingly popular, and for good reason! Not only are they cruelty-free, but they can also be just as delicious—if not more so—than their traditional counterparts. A vegan chocolate cake allows you to enjoy all the decadence of chocolate without using any animal products. This cake uses plant-based substitutes like flax eggs and non-dairy milk, making it suitable for people with dairy allergies, vegans, or anyone looking to try a different approach to baking. This cake is perfectly moist, with a rich cocoa flavor, and it’s topped with an equally luscious vegan chocolate frosting. Whether you’re hosting a birthday party, preparing a family gathering, or just looking for a sweet treat, this vegan chocolate cake will fit the bill. It’s easy to make, requires basic pantry ingredients, and produces a deliciously rich cake that everyone will love, vegan or not! Ingredients for Vegan Chocolate Cake To make this irresistible Vegan Chocolate Cake, you’ll need the following ingredients: All-purpose flour – This is the base of the cake. It gives the cake structure and helps provide a light, fluffy texture. Cocoa powder – Use rich, high-quality cocoa powder to get the deep chocolate flavor in your cake. Cocoa powder will give the cake its rich color and chocolatey taste. Baking soda – This acts as a leavening agent to help the cake rise. Sugar – The sweetness! You can use organic granulated sugar or other plant-based sweeteners like coconut sugar if you prefer. Flaxseed meal – This works as an egg replacement in vegan baking, adding moisture to the cake while binding the ingredients together. Non-dairy milk – Almond, oat, soy, or any other plant-based milk works well in this recipe. Vegetable oil – This helps create a moist, tender cake. You can also substitute with coconut oil if you prefer. Vanilla extract – Adds flavor and enhances the overall taste of the cake. Apple cider vinegar – This adds acidity and reacts with the baking soda to create a light and fluffy texture. Salt – Enhances the sweetness of the cake and balances the flavors. For the Vegan Chocolate Frosting, you’ll need: Powdered sugar – For sweetness and texture. Cocoa powder – To match the rich flavor of the cake. Vegan butter – The base for the frosting, ensuring it’s creamy and smooth. Non-dairy milk – To loosen the frosting to the desired consistency. Vanilla extract – For added flavor. Step-by-Step Instructions for Vegan Chocolate Cake Step 1: Preheat the Oven and Prepare the Pans Preheat your oven to 350°F (175°C). Grease and flour two round cake pans (8 or 9 inches in diameter) or line them with parchment paper. This ensures that your cake comes out of the pans easily once baked. Step 2: Mix the Dry Ingredients In a large mixing bowl, sift together the flour, cocoa powder, baking soda, and salt. Sifting ensures there are no lumps in the cocoa powder and helps distribute the dry ingredients evenly. Once sifted, whisk everything together to combine. Step 3: Mix the Wet Ingredients In a separate bowl, combine the flaxseed meal with water to make a flax egg. Let it sit for about 5 minutes until it thickens. Next, add the non-dairy milk, vegetable oil, apple cider vinegar, and vanilla extract. Whisk everything together until smooth and well combined. Step 4: Combine the Wet and Dry Ingredients Make a well in the center of the dry ingredients and pour in the wet ingredients. Stir gently with a spatula or a whisk until the batter comes together. Be careful not to overmix, as this can make the cake dense. The batter should be smooth, thick, and slightly pourable. Step 5: Bake the Cake Divide the batter evenly between the two prepared cake pans. Use a spatula to smooth the top of the batter and ensure it’s even. Bake for 30-35 minutes or until a toothpick inserted into the center of the cakes comes out clean or with just a few moist crumbs attached. Let the cakes cool in the pans for about 10 minutes before transferring them to wire racks to cool completely. Step 6: Prepare the Vegan Chocolate Frosting While the cake cools, prepare the frosting. In a large mixing bowl, beat the vegan butter until smooth and creamy. Gradually add the powdered sugar and cocoa powder, mixing well between each addition. Add the non-dairy milk a tablespoon at a time until you reach the desired frosting consistency. Beat in the vanilla extract and continue mixing until everything is smooth and fluffy. Step 7: Frost the Cake Once the cakes have completely cooled, spread a layer of frosting on top of the first cake layer. Gently place the second cake layer on top and frost the entire cake with the remaining frosting. You can make it as smooth or as decorative as you like, adding any extra chocolate shavings or sprinkles for a finishing touch. Why You’ll Love This Vegan Chocolate Cake This Vegan Chocolate Cake is a true crowd-pleaser. It’s rich and moist, with a deep chocolate flavor that’s hard to beat. The cocoa powder adds an intense chocolate taste that’s perfectly balanced with the sweetness of the cake and frosting. The flaxseed meal ensures the cake is light and fluffy without any eggs, while the non-dairy milk makes it completely plant-based. Whether you’re vegan or not, this cake will have everyone coming back for more. It’s perfect for birthdays, special occasions, or simply when you’re in the mood for a chocolate indulgence. Best of all, this cake is easy to make, requiring basic ingredients and minimal effort. Pro Tips for the Best Vegan Chocolate

How to Make Vegan Chocolate Cake with Rich Cocoa Read More »

How to Make Low-Sugar Vegan Coquito with Stevia or Monk Fruit

How to Make Low-Sugar Vegan Coquito with Stevia or Monk Fruit

Traditional Coquito, a beloved Puerto Rican holiday drink, is typically made with sweetened condensed milk or other sugary ingredients that can quickly add up in calories and sugar content. While it’s delicious, the high sugar content might not be suitable for everyone, especially those who are watching their sugar intake or following specific dietary guidelines, such as a low-carb or low-sugar lifestyle. In such cases, a low-sugar vegan Coquito provides an excellent alternative that allows you to enjoy the festive flavors of this traditional drink without the added sugar. By swapping out the traditional sugar and sweeteners with natural alternatives like Stevia or Monk Fruit, you can create a healthier version of the drink while still retaining the creamy texture and rich, spiced flavors that make Coquito so special. These plant-based sweeteners not only have a minimal impact on your blood sugar levels but also provide a guilt-free indulgence without compromising on taste. Plus, this version is fully vegan, ensuring that it’s free from dairy and other animal-based ingredients, making it suitable for people following a plant-based or dairy-free lifestyle. The best part? You don’t have to sacrifice the delicious flavors of Coquito. The use of coconut milk and coconut cream ensures that the drink remains rich and creamy, while the added spices of cinnamon, nutmeg, and cloves create that festive aroma and flavor that everyone loves. Whether you’re hosting a holiday gathering or just looking for a refreshing seasonal treat, this low-sugar vegan Coquito recipe is the perfect option. It offers a healthier alternative without skimping on the indulgent holiday vibes that Coquito is known for. Ingredients for Low-Sugar Vegan Coquito with Stevia or Monk Fruit Creating a perfect Low-Sugar Vegan Coquito starts with selecting the right ingredients. Fortunately, most of the ingredients are simple and easy to find, and many are already common pantry staples in vegan kitchens. Here’s a rundown of the key components that make up this creamy, festive drink: Coconut Milk & Coconut Cream: The primary ingredients that give Coquito its rich and indulgent texture. Full-fat coconut milk offers a creamy base that mimics the mouthfeel of traditional Coquito made with dairy, while coconut cream thickens the drink and provides an even richer texture. Brewed Coffee: Coffee isn’t just for mornings—it’s also a secret ingredient in Coquito that adds depth and complexity to the drink. The bitterness of the coffee pairs perfectly with the sweetness of the coconut milk and enhances the overall flavor. Spices: The warm flavors of cinnamon, nutmeg, and cloves are what make Coquito feel like a holiday tradition. These spices add richness and fragrance to the drink, making it extra cozy and festive. Sweetener (Stevia or Monk Fruit): To reduce the sugar content while still enjoying sweetness, you can choose from natural low-glycemic sweeteners like Stevia or Monk Fruit. Both options have little to no impact on blood sugar levels and are perfect for those looking to maintain a healthier lifestyle. Just adjust the amount based on your sweetness preference, as these sweeteners can vary in intensity. Rum: The traditional alcoholic ingredient in Coquito is rum, which adds a distinctive kick to the drink. If you prefer a non-alcoholic version, you can easily skip this ingredient without compromising the taste of the Coquito. With these ingredients, you’ll have all you need to create a delightful, dairy-free, and low-sugar version of Coquito. Whether you’re planning to make a batch for a holiday gathering or enjoy it on your own, these simple ingredients work together to provide a rich, flavorful experience. Step-by-Step Instructions for Making Low-Sugar Vegan Coquito with Stevia or Monk Fruit Step 1: Brew the Coffee The first step in creating your low-sugar vegan Coquito is to brew a cup of strong coffee. Coffee isn’t just for waking you up in the morning—it adds a rich, almost chocolate-like depth to the Coquito that elevates its flavor profile. Coffee and coconut are a classic combination, and when paired with the warming spices like cinnamon and nutmeg, they create a drink that feels both indulgent and comforting. Allow the brewed coffee to cool to room temperature before adding it to the mixture. This step is crucial because if you add hot coffee directly to the coconut milk, it can cause the milk to curdle. Once cooled, the coffee will blend smoothly into the coconut milk base, ensuring that the texture remains creamy. Step 2: Combine the Coconut Ingredients Next, it’s time to combine the base ingredients: coconut milk, coconut cream, cinnamon, nutmeg, and cloves. Add these ingredients to a blender and blend until smooth. This step is key to getting a rich, velvety texture that’s synonymous with Coquito. Coconut milk and coconut cream are both high in fat, which helps to create the creamy mouthfeel that makes this drink so luxurious. The spices play a major role in building the flavor profile. Cinnamon adds warmth, nutmeg brings a nutty, slightly sweet flavor, and cloves offer a more intense spiced note. The combination of these spices is what gives Coquito its signature holiday taste. Make sure all the ingredients are well-blended for a smooth, uniform mixture. Step 3: Sweeten with Stevia or Monk Fruit Once your base is ready, it’s time to add the low-glycemic sweetener of your choice: Stevia or Monk Fruit. The amount of sweetener you use can vary depending on your taste preferences and the brand you choose, so it’s best to start with a small amount and gradually increase it until the desired level of sweetness is achieved. Both Stevia and Monk Fruit are plant-based sweeteners that have little to no impact on blood sugar levels, making them excellent alternatives to traditional sugar. Incorporating the sweetener at this stage will allow it to fully dissolve into the coconut base, creating a harmonious balance of flavors. Taste your Coquito as you go along, adjusting the sweetness to suit your personal preference. Step 4: Add the Coffee Now, pour in your cooled brewed coffee into the blender with the coconut mixture.

How to Make Low-Sugar Vegan Coquito with Stevia or Monk Fruit Read More »

How to Make Vegan Coquito with Coffee for a Bold Flavor

How to Make Vegan Coquito with Coffee for a Bold Flavor

Coquito is a beloved Puerto Rican drink typically enjoyed during the holiday season, known for its rich and creamy coconut base. This Vegan Coquito with Coffee variation adds a bold, deep flavor that perfectly balances the sweetness of coconut with the robust notes of coffee. Whether you’re a coffee lover or just looking to spice up your Coquito recipe, this version is sure to become a new favorite. Why You’ll Love Vegan Coquito with Coffee This Vegan Coquito with Coffee is a unique twist on the traditional Coquito. The coffee adds an extra layer of richness, making it a perfect drink for any occasion, especially holiday gatherings or cozy evenings. The creamy coconut and warm spices pair beautifully with the coffee’s bold flavor, creating a smooth and decadent treat that’s both comforting and energizing. Plus, it’s completely plant-based, so everyone can enjoy it! Ingredients for Vegan Coquito with Coffee For the Coquito Base: 1 can of full-fat coconut milk (13.5 ounces) – Description: This is the key base ingredient for the Coquito, providing a rich, creamy texture and the signature coconut flavor that’s central to the drink. Full-fat coconut milk gives the Coquito its indulgent consistency, making it smooth and luscious. 1/2 cup coconut cream – Description: Coconut cream enhances the richness of the Coquito, thickening the texture and making the drink even more luxurious. It’s perfect for those who love their Coquito extra creamy. If you can’t find coconut cream, you can use additional coconut milk, but the cream adds the ideal texture. 1/2 cup strong brewed coffee (cooled) – Description: Coffee adds a bold, caffeinated twist to the classic Coquito, making this version a flavorful fusion of tropical and coffeehouse tastes. It brings depth and complexity to the drink, balancing the sweetness and coconut richness. Make sure the coffee is cooled before adding it to the mixture to prevent curdling. 1/2 cup maple syrup or agave syrup – Description: Maple syrup (or agave syrup) serves as the natural sweetener in this recipe, ensuring the Coquito has the perfect level of sweetness without refined sugar. Maple syrup also adds its own subtle, caramel-like flavor, which pairs wonderfully with the coconut and coffee. 1 teaspoon ground cinnamon – Description: Ground cinnamon is an essential spice that imparts warmth and coziness to the Coquito. It adds a festive, aromatic quality that balances the creaminess of the coconut and the boldness of the coffee. 1/2 teaspoon ground nutmeg – Description: Nutmeg enhances the overall flavor profile of the Coquito, offering a deeper, spiced warmth that pairs well with cinnamon. Nutmeg complements the sweetness of the maple syrup and adds a nice complexity to the drink. 1/2 teaspoon ground cloves – Description: Cloves bring an earthy, aromatic flavor that deepens the spiced notes of the Coquito. It’s a warm spice that blends beautifully with cinnamon and nutmeg, adding a distinctive layer to the overall flavor. 1 teaspoon vanilla extract – Description: Vanilla extract adds a touch of sweetness and a subtle flavor that rounds out the spices and balances the rich coconut creaminess. It provides a lovely depth to the drink without overpowering the other flavors. 1/4 cup white rum (optional) – Description: White rum is optional, but if included, it provides a classic Coquito kick. It adds a slight boozy warmth that enhances the drink’s depth and makes it feel more authentic. If you prefer a non-alcoholic version, simply skip this ingredient without losing the drink’s deliciousness. For the Garnish: Optional garnishes: Shredded coconut – Adds texture and an extra coconut flavor to the drink, making it feel even more indulgent. Ground cinnamon or nutmeg – A sprinkle of cinnamon or nutmeg on top adds a beautiful touch, both in terms of presentation and flavor. Cinnamon stick – A festive garnish that enhances the visual appeal of the Coquito while infusing a hint of cinnamon as you sip. Cinnamon stick – For decoration and extra flavor. Shredded coconut – A sprinkle on top for texture. Whipped coconut cream – For an indulgent topping (optional). Step-by-Step Instructions for Making Vegan Coquito with Coffee Step 1: Brew the Coffee Start by brewing your coffee. Use a strong blend to ensure the flavor shines through. Let it cool before using it in the Coquito mix. Step 2: Combine the Coconut Ingredients In a blender, add the full-fat coconut milk, coconut cream, maple syrup (or agave syrup), ground cinnamon, ground nutmeg, and ground cloves. Blend until smooth and well combined. Step 3: Add the Coffee and Vanilla Once the coconut base is blended, pour in the cooled brewed coffee and vanilla extract. Blend again to combine all the ingredients. The coffee will give the Coquito a deep, rich flavor that pairs perfectly with the creamy coconut. Step 4: Add the Rum (Optional) If you’re making an alcoholic version, add the white rum to the blender and blend again. This adds the traditional Coquito kick, but you can skip it for a non-alcoholic version. Step 5: Chill the Coquito Pour the Coquito into a bottle or airtight container and refrigerate for at least 2-3 hours, or preferably overnight. Chilling the Coquito allows the flavors to meld together, creating a smooth, well-balanced drink. Step 6: Serve and Garnish Before serving, give the Coquito a good shake to remix any settled ingredients. Pour the Coquito into glasses and garnish with a cinnamon stick, a sprinkle of shredded coconut, and even a dollop of whipped coconut cream if desired. Tips for Making the Best Vegan Coquito with Coffee Use Strong Coffee: The coffee flavor is key to this recipe, so make sure to brew a strong coffee that will stand out against the coconut and spices. Espresso or dark roast works best. Adjust Sweetness: Feel free to adjust the sweetness based on your preference. If you prefer a sweeter drink, you can add more maple syrup or agave syrup. Chill Before Serving: For the best flavor, chill the Coquito for a few hours or overnight. This helps the flavors

How to Make Vegan Coquito with Coffee for a Bold Flavor Read More »

Join us on this journey to create awareness and drive change!

You have been successfully Subscribed! Ops! Something went wrong, please try again.

Company

About Us

Privacy Policy

Term Of Use

Disclaimer

Contact

Info@creative.com

+1-202-555-0140

1463 Chandler Drive Springfield, MO 65806

© 2024 Created with Abdiblog.com

Scroll to Top